|
|
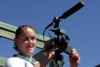
| Good camera-work will allow your audience
to see things from your perspective. Plan your shots and
practice different camera movements and get to know the
settings on your camera. |
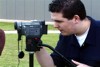
Camera Features
|
| To successfully focus, zoom all the way
in and focus on an area high in detail, such as the eyes.
Then zoom out to your desired shot. Everything should
be in focus. |
| At times the Auto Focus setting can be
unreliable (objects can tend to jump in and out of focus).
Manual Focus is more reliable and enables you to create
a better depth of field. Use manual focus particularly
when your subject is stationary. Shooting slightly out
of focus however, can provide mysterious effects if needed. |
| Try to keep zooming to a minimum when
shooting video. Zooming is used mainly to frame a shot
before shooting. Dollying is a more effective natural
movement. Getting closer to your subject will allow you
to zoom less, and create steadier shots. |
| The iris of the camera opens or closes
to let in or shut out light. If too much light gets in
a subject can become over-exposed. If there is not enough
light the subject may be under-exposed or dark. Generally
auto-exposure works well, but there may be times when
you would like to control the exposure especially for
a special effect. Always make sure your subject looks
good in terms of exposure. |
| The white balance setting relates to
the colour balance of a shot and allows you to adjust
the colour of a shot. Generally auto white balance works
well. Whenever the source of light changes eg from outside
to inside shooting you should always check the white balance
on the camera. By adjusting the white balance levels you
can give a shot a reddish or orange tinge to make the
shot look warm and relaxed. A greeny, grey, bluish tinge
often makes the shot look cold or depressing. |
Camera Shots
|
There are three basic shot sizes:
A wide shot shows the whole scene, and gives the audience
an idea of where the action is taking place. This is often
called an establishing shot (as it establishes the setting)
and is often used at the beginning of a scene or sequence,
and may be combined with a panning movement of the camera
to show us a wider area. This type of shot may be used
to make objects look large, impressive or powerful. A
wide shot can be used to create feelings of loneliness
of emptiness. |
| A mid or medium shot is closer to the
action than a wide shot. It is used to make the audience
feel more involved in the story and identify with characters. |
In a close-up the subject fill the whole
scene. It grabs your attention and can help create suspense
or reveal emotion. Close ups of objects may serve as the
in point to a new scene, depicting a new fact or location
in the story. A close up of a person have a number of
different functions:
It can…
• establish a main character
• precede a point of view shot eg. someone who is
watching an event
• to show the reaction of a character, ie. a reaction
shot. |
| Having a wide variety of shots is important
as it keeps the audience engaged. Using different shots
helps to focus the attention of an audience on to what
is important. |
Include a range of wide shots, mid shots
and close-up shots.
Consider point of view shots, and cut-away shots where
appropriate. |
| Anticipation shots help to get the audience
ready for an important action by building tension. |
| Reaction shots are important because
it helps an audience identify with characters. |
| A sequence of shots can be edited at
different speeds. Longer shots or slowing down the pace
can create tension or romance. Shorter shots increase
the pace and suggest energy and excitement. |
| Lots of edits keep your shots changing
to create a sense of excitement. Pairing is where a sequence
or scene is built up by alternating one set of shots with
another. |
Some examples include…
• Conversation shots…Where the shots alternate
from one person to the other. Angles may be used to suggest
inferiority or superiority.
• An over the shoulder shot is generally a medium
shot where a person is filmed head-on from over the shoulder
of another person. The shot generally includes part of
that character’s shoulder or the side of the head
in the shot
• A reverse shot is a shot taken from an angle 180°
opposed to the previous shot. Reverse shots are often
used as alternating over the shoulder conversation shots.
• We often see shots of a character that are alternated
with shots of what he/she sees. The shot of the character
is looking at is called the point of view (P.O.V.) shot.
A POV shot uses a subjective camera angle that becomes
the perspective of a character. We look at the world through
his or her eyes.
• Cut away shots direct attention away from the
main shot or scene to introduce other information, elements
or subjects that may be related in some way. |
Camera Angles
|
Angles can influence the audience and
tell them more about a story or the characters.
A normal camera angle is aimed at eye level and suggests
the subject is on our level and equal to us.
A high shot is where the camera is aimed above the subject
and can help make it look and feel small, unimportant,
afraid or vulnerable
A low shot is where the camera is below the subject and
can help make it seem tall, powerful, important or frightening
A distorted angle may be used to make a scene more frightening,
or to make the viewer feel anxious, or queasy (especially
if fast or jerky camera movement is also used). |
Camera Movement
|
It is generally done with the help of
a tripod.
Tilting refers to the vertical tipping of the camera.
Can be used to emphasise height or depth
Dollying refers to the movement of the camera towards
or away from a subject. This camera action is sometimes
called tracking. |
Next:
Rules & Practices
Back: How
to Shoot Video (view
the site map) |